
Replacing the Rear Brake Caliper on a TBR7 Motorcycle
Complete Walkthrough: How to Replace the Rear Brake Caliper on a TBR7 Motorcycle
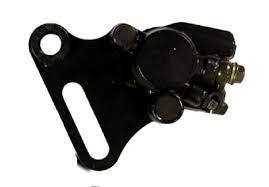
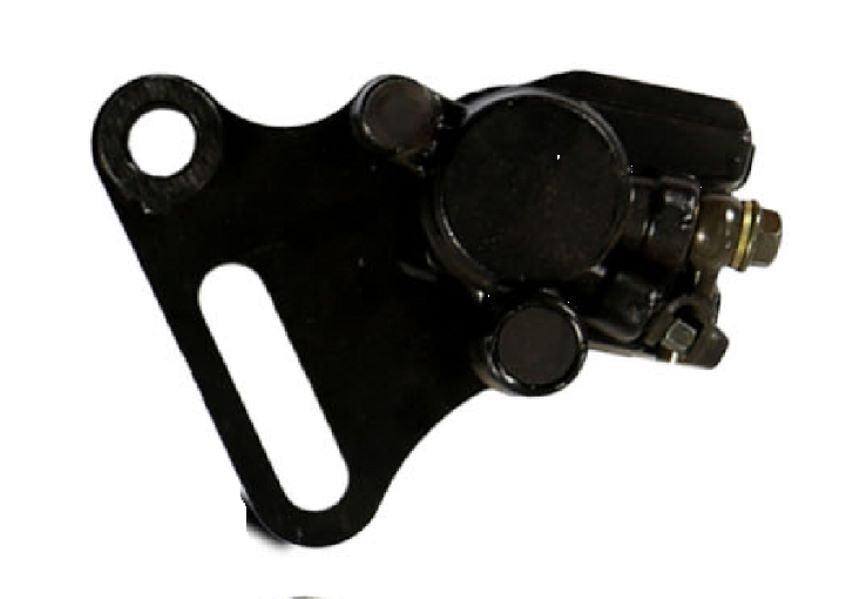
When it comes to motorcycle maintenance, the brake system is a critical component that requires regular attention. For TBR7 owners, ensuring the proper functioning of the rear brake caliper is essential for safe riding. In this in-depth guide, we will delve into the step-by-step process of replacing the rear brake caliper on your TBR7 motorcycle using the TBR7 Rear Disk Brake Caliper.
Detailed Instructions for Rear Brake Caliper Replacement:
- Begin by preparing your workspace and ensuring you have all the necessary tools for the job. Safety goggles and gloves are recommended.
- Securely place your TBR7 motorcycle on a center stand or lift to facilitate easy access to the rear wheel and brake components.
- Remove the rear wheel of the motorcycle to gain clear access to the rear brake caliper assembly. Make sure to support the wheel properly to prevent damage.
- Locate the rear brake caliper and inspect it for any visible signs of damage, such as leaks or worn-out brake pads. If any issues are observed, proceed with replacing the caliper.
- Using the appropriate tools, loosen the caliper mounting bolts and carefully detach the caliper from the brake bracket. Keep track of the orientation of the caliper for reinstallation.
- Detach the brake line from the old caliper and remove the caliper from the bike. Take this opportunity to clean the brake bracket and surrounding areas.
- Position the new TBR7 Rear Disk Brake Caliper in place, aligning it correctly with the brake rotor. Ensure a snug fit before reconnecting the brake line.
- Attach the brake line to the new caliper, making sure it is securely fastened to prevent any leaks. Double-check all connections for tightness and proper alignment.
- Secure the caliper in place by tightening the mounting bolts to the recommended torque specifications. Avoid over-tightening the bolts to prevent damage.
- Reinstall the rear wheel onto the motorcycle, ensuring proper alignment and torque of the axle nut. Check the wheel rotation to confirm smooth operation.
- Test the brake system by gently applying the rear brake lever. Listen for any unusual noises and confirm that the caliper engages smoothly with the rotor.
- Once the brake system passes the initial test, take your TBR7 motorcycle for a test ride in a safe and controlled environment. Gradually test the brakes at different speeds to ensure optimal performance.
By following these detailed steps, you can efficiently replace the rear brake caliper on your TBR7 motorcycle with the reliable TBR7 Rear Disk Brake Caliper. Remember to prioritize safety and precision throughout the replacement process for a worry-free riding experience.
For more information or to purchase the TBR7 Rear Disk Brake Caliper, visit here.