How to Use a Multimeter for 12V Troubleshooting
Share
How to Use a Multimeter for 12V Troubleshooting
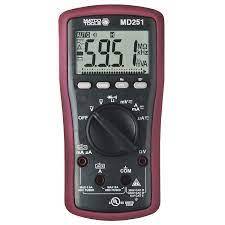
When it comes to troubleshooting electrical issues in a 12V system, a multimeter is an invaluable tool. Whether you're working on a vehicle, a boat, or any other 12V system, understanding how to use a multimeter can save you time and frustration.
Step 1: Safety First
Before you start using a multimeter, ensure your safety by following these precautions:
- Wear safety goggles and gloves to protect yourself from any potential electrical hazards.
- Make sure the 12V system is turned off before connecting or disconnecting any wires.
- Keep your work area clean and free from any flammable materials.
Step 2: Familiarize Yourself with the Multimeter
Before diving into troubleshooting, take the time to familiarize yourself with your multimeter. Read the user manual and understand the different functions and settings available. Pay attention to the following:
- AC and DC voltage settings
- Resistance and continuity settings
- Amperage settings and maximum limits
Step 3: Testing Voltage
One of the most common uses of a multimeter is to measure voltage. To test voltage in a 12V system, follow these steps:
- Set your multimeter to DC voltage mode.
- Connect the black probe to the negative (-) terminal and the red probe to the positive (+) terminal of the battery or the component you want to test.
- Read the voltage value displayed on the multimeter screen. It should be around 12V for a fully charged 12V battery.
Step 4: Checking Continuity
Continuity testing is useful for checking the flow of electrical current through a circuit. To check continuity using a multimeter, follow these steps:
- Set your multimeter to continuity mode.
- Connect one probe to each end of the circuit you want to test.
- If there is continuity, the multimeter will emit a beep or display a low resistance value. If there is no continuity, it means there is a break in the circuit.
Step 5: Measuring Resistance
To measure resistance using a multimeter, follow these steps:
- Set your multimeter to resistance mode.
- Disconnect the component from the circuit you want to measure.
- Connect the probes to each end of the component.
- Read the resistance value displayed on the multimeter screen. Compare it to the expected resistance value for the component you are testing.
Step 6: Testing Amperage
In addition to voltage, continuity, and resistance, a multimeter can also measure amperage. However, when measuring amperage in a 12V system, it's important to follow these precautions:
- Make sure the circuit you are testing is capable of handling the amperage being measured. Check the multimeter's maximum amperage limit and ensure it is higher than the expected amperage.
- Never connect the multimeter in series with the power source. Instead, connect it in parallel by breaking the circuit and placing the multimeter in line with one of the ends.
- Start with the highest amperage range on the multimeter and gradually decrease it until you get an accurate reading.
- Read the amperage value displayed on the multimeter screen. Compare it to the expected amperage for the specific component or circuit.
Step 7: Troubleshooting Common 12V Issues
Knowing how to use a multimeter for 12V troubleshooting can help you identify and resolve common electrical issues. Here are a few examples:
Issue 1: Dead Battery
If your 12V system fails to start, it could be due to a dead battery. Use your multimeter to measure the voltage across the battery terminals. If the reading is significantly below 12V, it indicates a dead or weak battery that needs to be replaced.
Issue 2: Faulty Fuse
If a particular circuit is not working, it may be due to a blown fuse. Use the multimeter to check the continuity of the fuse. If there is no continuity, replace the fuse with a new one of the same rating.
Issue 3: Poor Ground Connection
When experiencing intermittent electrical issues, a poor ground connection can be the culprit. Use the multimeter to check the resistance between the ground connection and the negative terminal of the battery. A high resistance reading indicates a poor ground connection that needs to be fixed.
Step 8: Consult Professionals if Needed
While a multimeter can help you diagnose and troubleshoot many 12V electrical issues, there may be situations where professional assistance is necessary. If you encounter complex or potentially dangerous problems, it's always best to consult a qualified electrician or mechanic.
Conclusion
A multimeter is an indispensable tool for troubleshooting electrical issues on 12V systems for powersports vehicles. By following the steps outlined in this guide, you can effectively use a multimeter to measure voltage, check continuity, measure resistance, and even test amperage. Remember to always prioritize safety and consult the user manual specific to your multimeter for accurate instructions and precautions.
