
How to Properly Use a Caliper for Taking Accurate Measurements
Share
taking Precise & accurate measurements
When it comes to precision measurements, using the right tools is crucial. One such tool is a caliper, which is widely used in various industries such as engineering, manufacturing, and PowerSports repair. In this article, we will guide you on how to properly use a caliper to ensure accurate measurements.
Types of Calipers
There are several types of calipers available, but the two most commonly used are vernier calipers and digital calipers.
Vernier Calipers
Vernier calipers consist of two main scales: the fixed scale and the sliding scale. The fixed scale remains stationary, while the sliding scale moves to take measurements. The sliding scale has a Vernier scale that allows for greater precision in measurements.
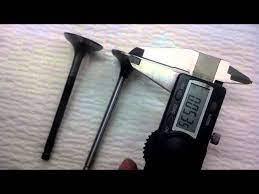
Digital Calipers
Digital calipers have an electronic display that directly shows the measurement value. They are easy to read and provide precise measurements, making them popular among professionals.
Step-by-Step Guide
- Prepare the caliper by ensuring it is clean and free from any dirt or debris. This will help in obtaining accurate measurements.
- Choose the appropriate type of caliper for your measurement task. Vernier calipers are suitable for most applications, while digital calipers provide quicker and more precise measurements.
- Hold the caliper with a firm grip, making sure your fingers do not obstruct the measuring jaws.
- Place the object to be measured between the jaws of the caliper. Ensure that it is positioned securely and flush against the measuring faces.
- Close the jaws gently until they come into light contact with the object. Do not apply excessive force, as it may distort the measurement.
- Read the measurement value on the caliper's scale. For vernier calipers, align the zero mark of the sliding scale with the main scale to obtain an accurate reading. Digital calipers provide a direct digital display of the measurement.
- Take multiple measurements to ensure accuracy. Repeat the process and compare the readings to verify consistency.
- Record the measurements in the appropriate units, such as inches or millimeters, depending on your requirements.
Tips for Accurate Measurements
- Always use the appropriate type of caliper for your specific measurement task.
- Ensure the object being measured is clean and free from any debris that may affect the accuracy of the measurement.
- Take multiple measurements and compare the readings to ensure consistency.
- Store your caliper in a protective case when not in use to prevent damage and maintain accuracy.
- Regularly calibrate your caliper according to the manufacturer's instructions to ensure its accuracy over time.
- Practice using the caliper on various objects to improve your proficiency and accuracy in measurements.
Common Mistakes to Avoid
When using a caliper, it's important to be aware of common mistakes that can lead to inaccurate measurements. Avoid the following:
- Applying excessive force when closing the jaws, as it can deform the object being measured.
- Allowing your fingers to obstruct the measuring jaws, which can affect the accuracy of the measurement.
- Not ensuring that the object is flush against the measuring faces, resulting in an incorrect measurement.
- Ignoring the need for calibration, which can lead to inaccurate readings over time.
Additional Tips and Techniques
Here are some additional tips and techniques to help you use a caliper effectively:
1. Zero Calibration
Before taking measurements, it's important to ensure that the caliper is properly zeroed. This means that the zero mark on the caliper's scale aligns perfectly with the reference point or the jaws are closed with no gap. If the zero calibration is off, you may get inaccurate readings.
2. Depth Measurement
In addition to measuring external dimensions, calipers can also be used to measure depth. Most calipers have a depth rod that can be extended from the back. Simply place the depth rod against the surface and take the measurement using the same steps as for external measurements.
3. Inside Measurements
For inside measurements, such as the diameter of a hole or the width of a groove, you can use the measuring jaws of the caliper. Place the caliper jaws inside the object and gently close them until they are in light contact with the sides. Take the measurement as usual, ensuring accuracy and consistency.
4. Measuring Non-Flat Surfaces
When measuring non-flat or curved surfaces, it's important to position the caliper jaws perpendicular to the surface. This will ensure that the measurement is taken at the widest point, providing an accurate reading.
5. Measuring Thin Objects
When measuring thin objects, such as sheets of paper or metal, it's important to be cautious and gentle. Apply minimal pressure to avoid bending or warping the object, which may affect the accuracy of the measurement.
Conclusion
A caliper is an indispensable tool for precise measurements in various industries. By following the step-by-step guide, implementing the tips and techniques mentioned in this article, and avoiding common mistakes, you can ensure accurate measurements and improve the quality of your work. Remember, practice makes perfect, so keep honing your skills with a caliper to become a master at taking precise measurements.