
How to Change the Gas Tank Float Assembly on a Scooter
Share
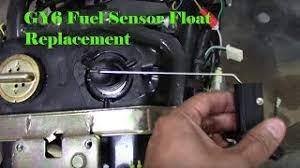
Gas gauge stopped working, it maybe the fuel float assembly
When it comes to maintaining your scooter, there may come a time when you need to replace the gas tank float assembly. The gas tank float assembly is responsible for measuring the fuel level in your scooter's tank, allowing you to accurately monitor its fuel consumption. In this article, we will guide you through the step-by-step process of changing the gas tank float assembly on your scooter.
Step 1: Gather the Necessary Tools
Before you begin, make sure you have the following tools:
- Socket wrench set
- Flat-head screwdriver
- New gas tank float assembly
- Rag or towel
Step 2: Prepare Your Scooter
Start by turning off the ignition and removing the key. This will ensure that your scooter is completely powered down. Locate the gas tank and use a rag or towel to clean the area around it. This will help prevent any dirt or debris from falling into the tank during the assembly replacement.
Step 3: Remove the Old Gas Tank Float Assembly
Using a socket wrench, carefully loosen and remove the screws or bolts that secure the gas tank in place. Once the tank is free, gently lift it off the scooter. Locate the old gas tank float assembly, which is usually attached near the top of the tank, and carefully disconnect any wires or hoses connected to it. Use a flat-head screwdriver to loosen any clamps or connectors.
Step 4: Install the New Gas Tank Float Assembly
Take the new gas tank float assembly and align it with the mounting position on the gas tank. Secure it in place by tightening the screws or bolts. Reconnect any wires or hoses that were previously detached, making sure they are properly connected. Use the flat-head screwdriver to secure any clamps or connectors.
Step 5: Reassemble Your Scooter
With the new gas tank float assembly in place, carefully lower the gas tank back onto your scooter. Ensure that it is aligned correctly and securely fastened using the socket wrench. Double-check that all wires and hoses are properly connected and tightened.
Step 6: Test for Proper Functioning
Once the gas tank is reassembled, turn on the ignition and start your scooter. Observe the fuel gauge to ensure that it accurately reflects the fuel level in the tank. If the gauge behaves erratically or does not display the correct fuel level, double-check all connections and consult a professional if needed.
Step 7: Maintenance Tips
Replacing the gas tank float assembly is an essential maintenance task for your scooter. Here are a few additional tips to keep in mind:
- Inspect your gas tank float assembly regularly. Look for any signs of wear, damage, or corrosion. If you notice any issues, it's recommended to replace the assembly as soon as possible.
- Keep your gas tank clean and free from debris to ensure the smooth operation of the float assembly. Regularly clean the exterior of the tank and use a fuel additive to keep the interior clean.
- When replacing the gas tank float assembly, check the fuel filter and fuel lines for any signs of clogging or damage. Replace them if necessary to maintain proper fuel flow.
- If you are unsure about any step in the process or encounter difficulties, it's always best to consult a professional mechanic or refer to your scooter's user manual.
Step 8: Safety Precautions
While changing the gas tank float assembly is a relatively straightforward task, it is essential to prioritize safety during the process. Here are some safety precautions to follow:
- Work in a well-ventilated area to prevent the accumulation of fuel vapors.
- Wear protective gloves and safety glasses to protect your hands and eyes from any potential hazards.
- Ensure that the scooter is on a stable surface to prevent it from tipping over during the assembly replacement.
- Avoid smoking or open flames in the vicinity of the scooter to prevent any potential fuel-related accidents.
Conclusion
Changing the gas tank float assembly on your scooter may seem like a daunting task, but by following these step-by-step instructions, you can successfully replace it yourself. Remember to always prioritize safety and consult a professional if you are unsure or uncomfortable with any step of the process. Proper maintenance and regular inspection of your scooter's fuel system will help keep it running smoothly for years to come.